August Product Updates: Centralized Contact cards, public events & smarter search

We're back!✨ It's been a longer stretch than usual since the last Product Update with summer holidays and our code freeze got in the way, but of course we love to keep busy behind the scenes, so there's quite a lot new really cool updates we think will make your days easier!
New features
Centralized Contact cards across Media Center and Screening Room
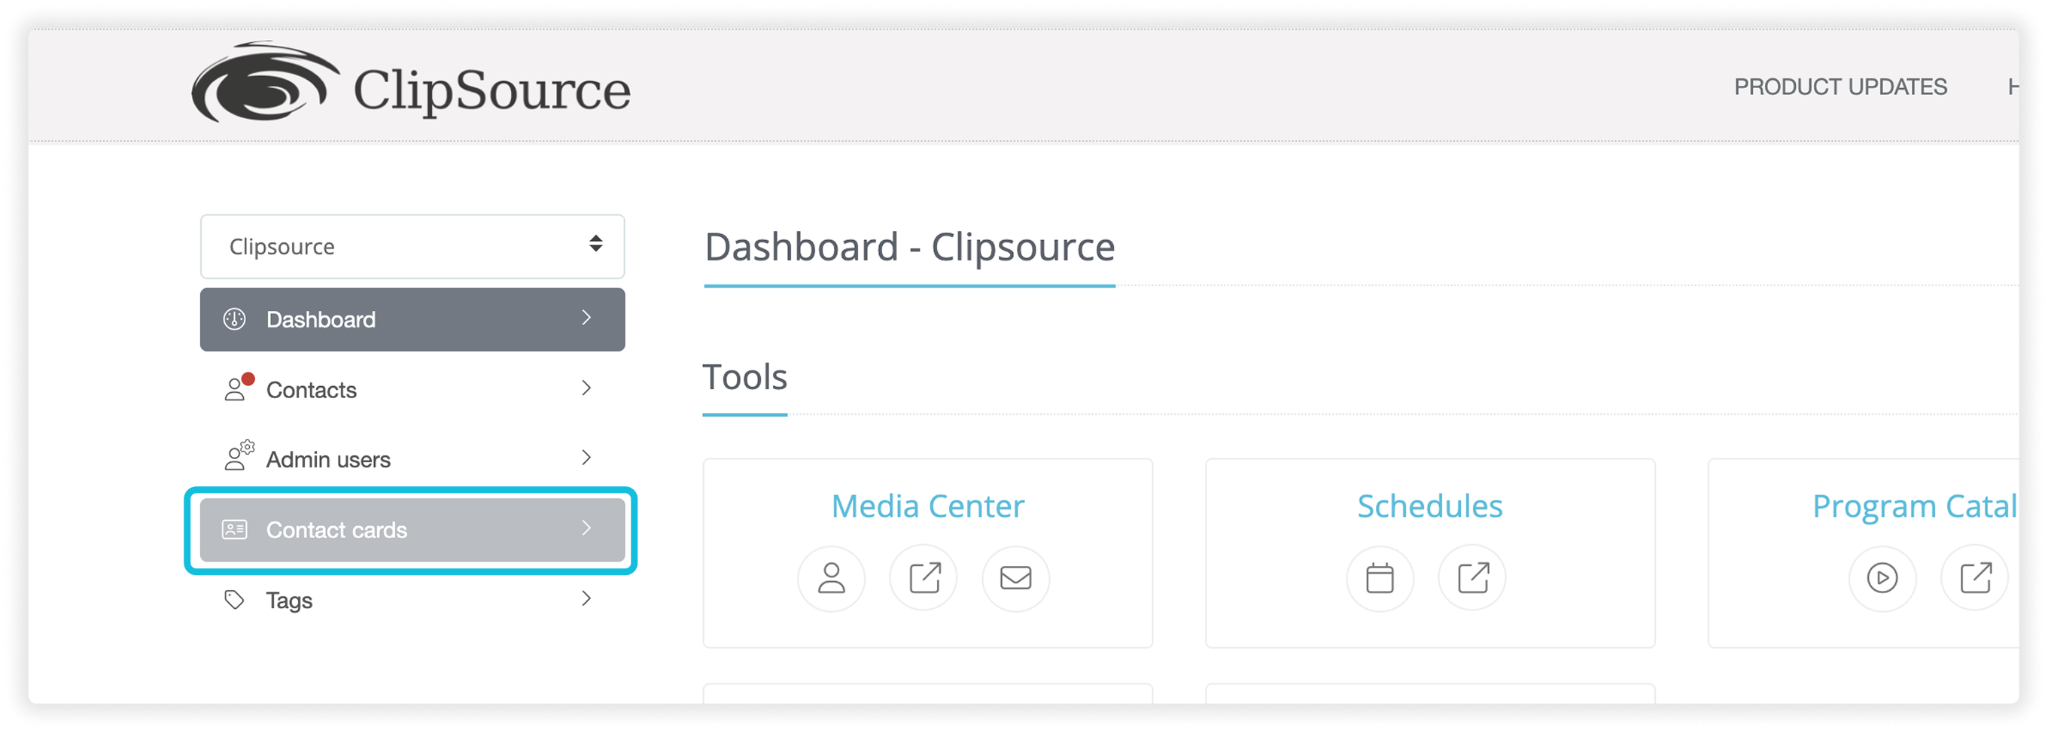
Contact Cards used to live in Media Center only, while Screening Room had its own separate contact solution. That's now one single feature.
Contact Cards are managed from the Dashboard, and the cards you create there can be reused across both Media Center and Screening Room — added to Posts, Events and Screeners alike. Publish something in Media Center and something in Screening Room, and you get the same Contact Cards in both places. The same goes for the portal.
We've also made the admin experience much more scalable for those of you managing a lot of contacts:
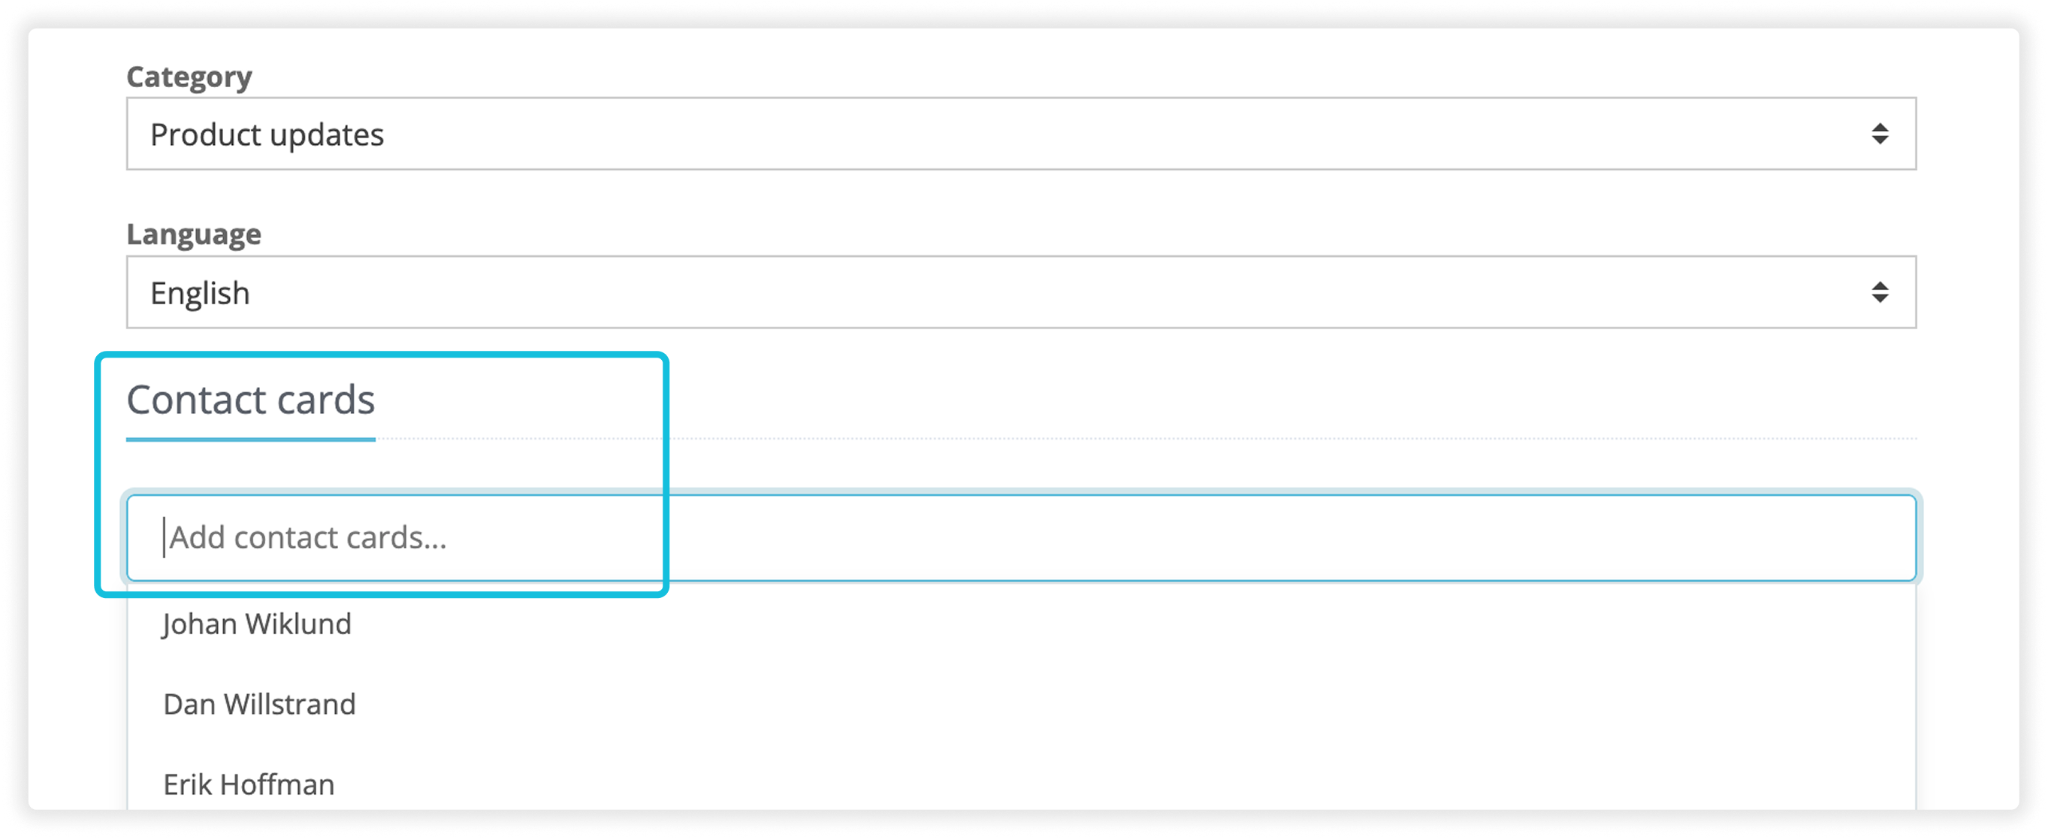
Search instead of scroll.
Instead of showing every available card as a checkbox, you now search for and select Contact cards using the same selector we use for tags. Add one or several.
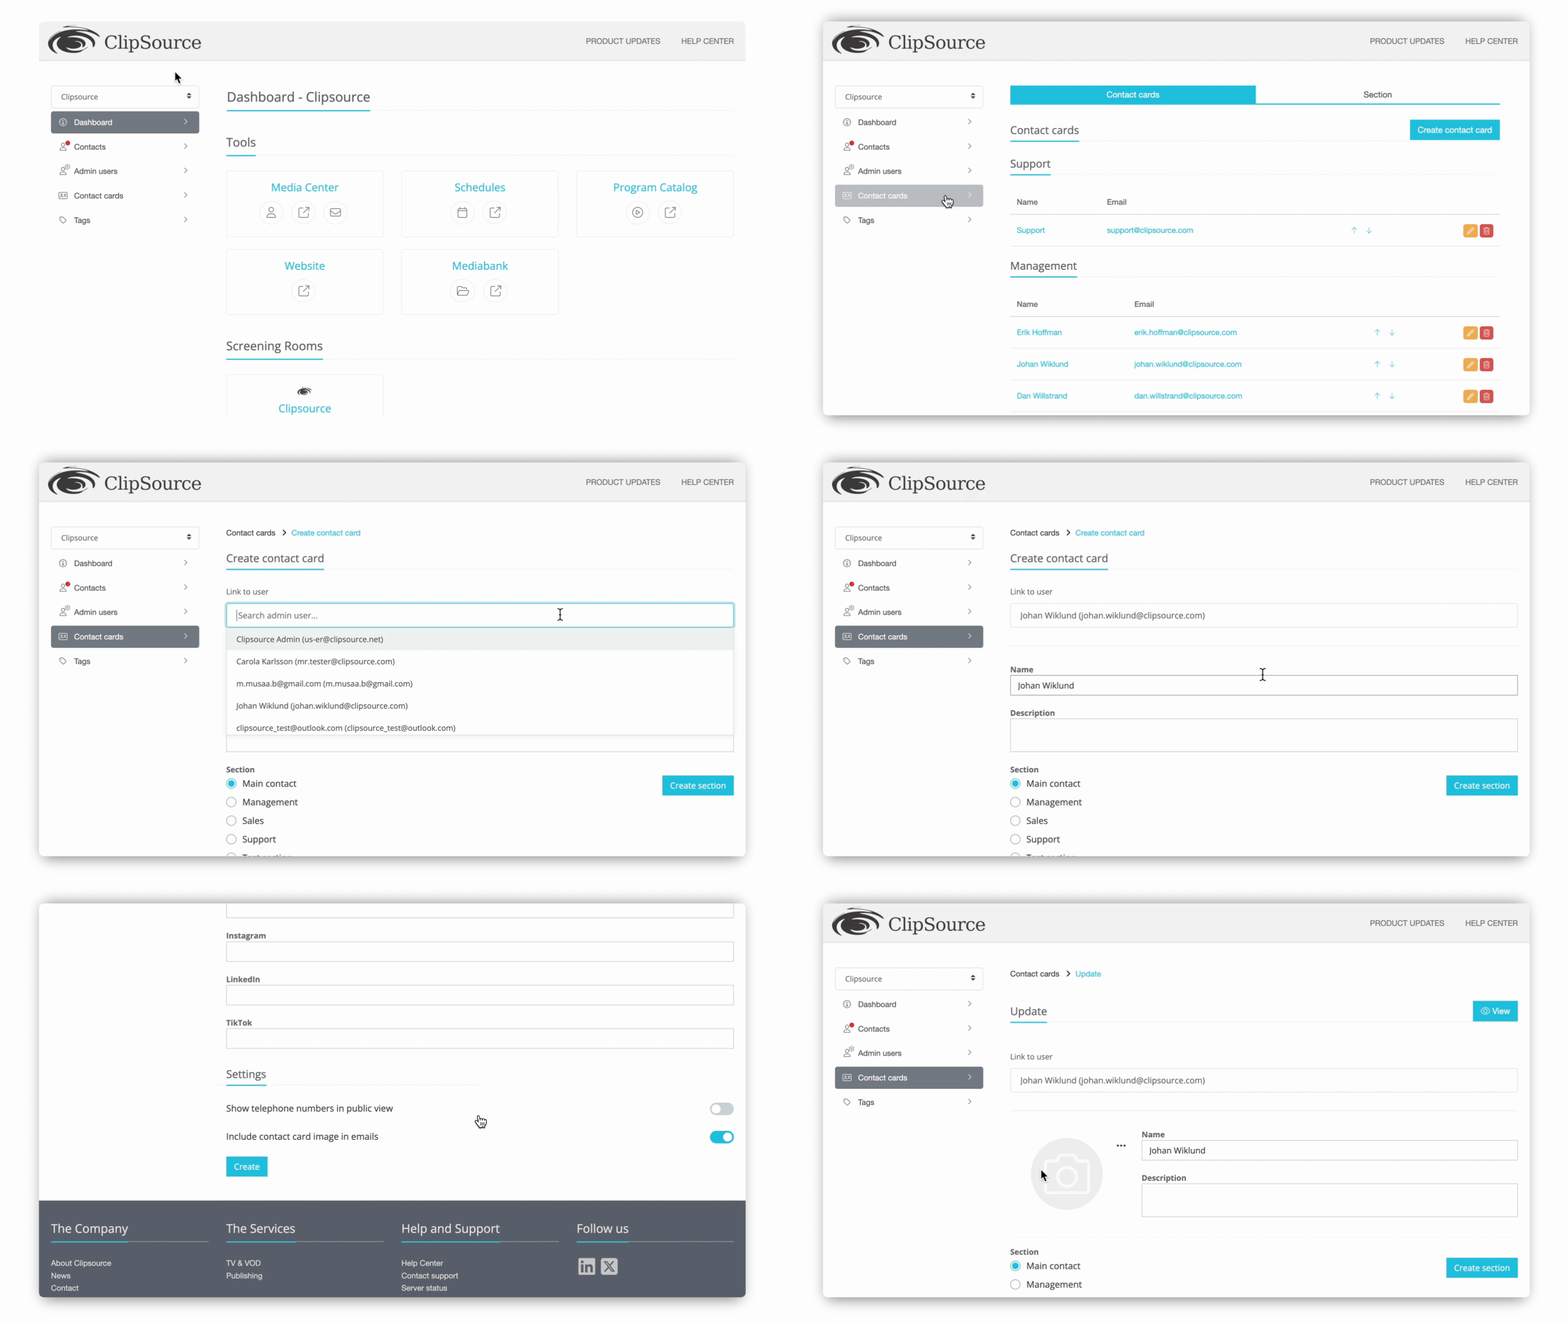
Connect a card to an Admin user.
When creating a Contact card, you can search for an existing Admin user and link to it — some of the details are then filled in for you. You don't have to connect a card to a user, though; creating one manually (for a shared "Press" contact, for example) works exactly as before.
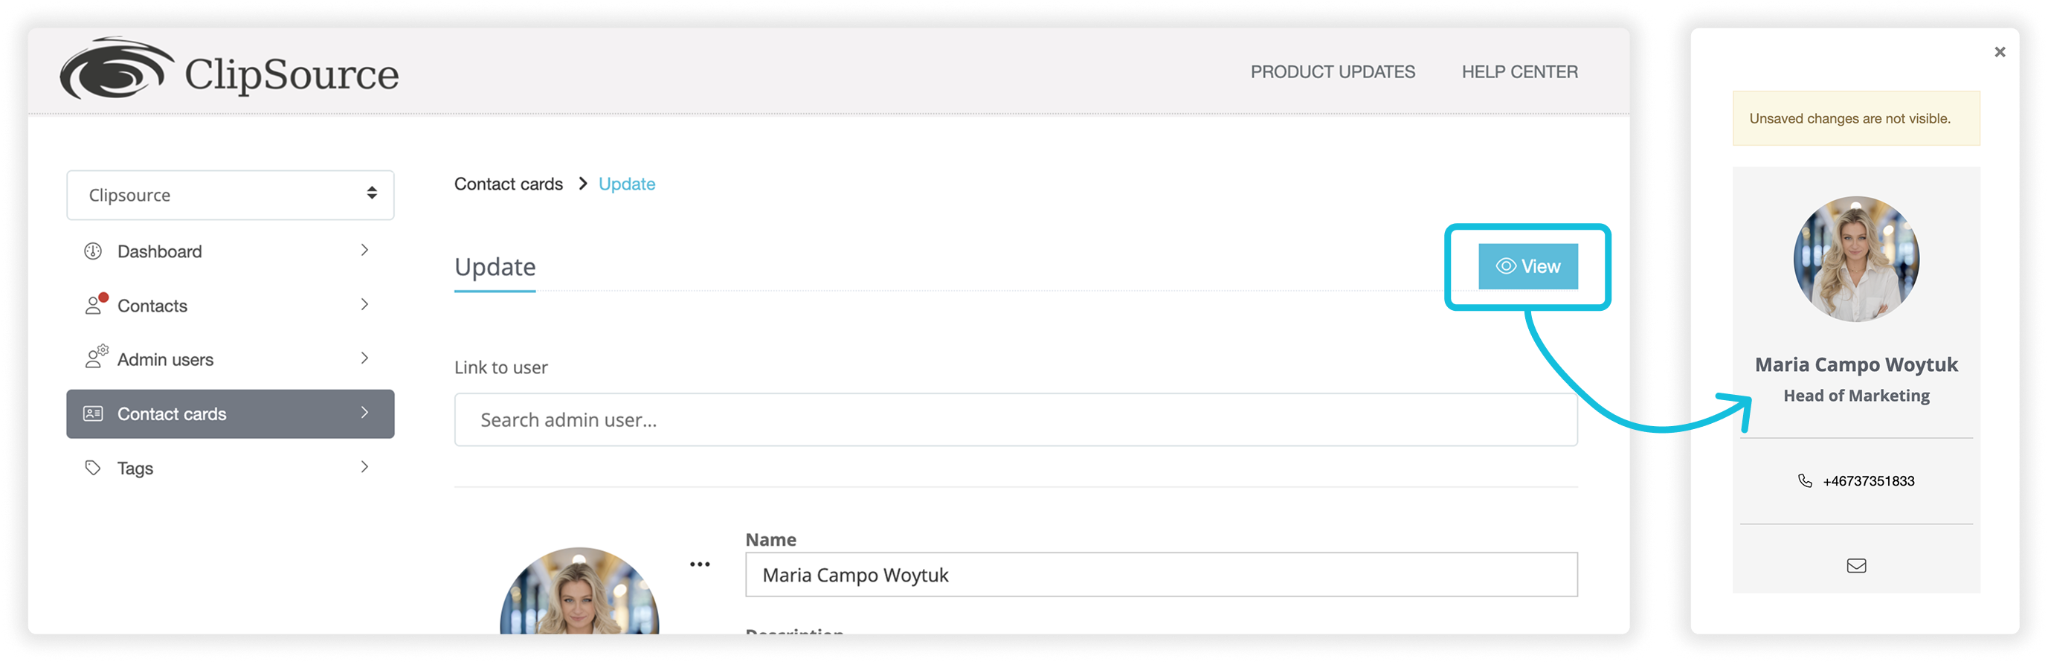
Preview before you publish.
While managing, creating or editing a Contact card, you can see exactly how it will look using the preview in the upper right corner.
⚠️️️ Note: If you already have contacts configured in Screening Room, those keep working as before — nothing you have set up today disappears.
Where to find it: Left hand menu dashboard → Contact cards. To use them: any Post, Event or Screener → Scroll down to Contact cards section → search and select
Public Events
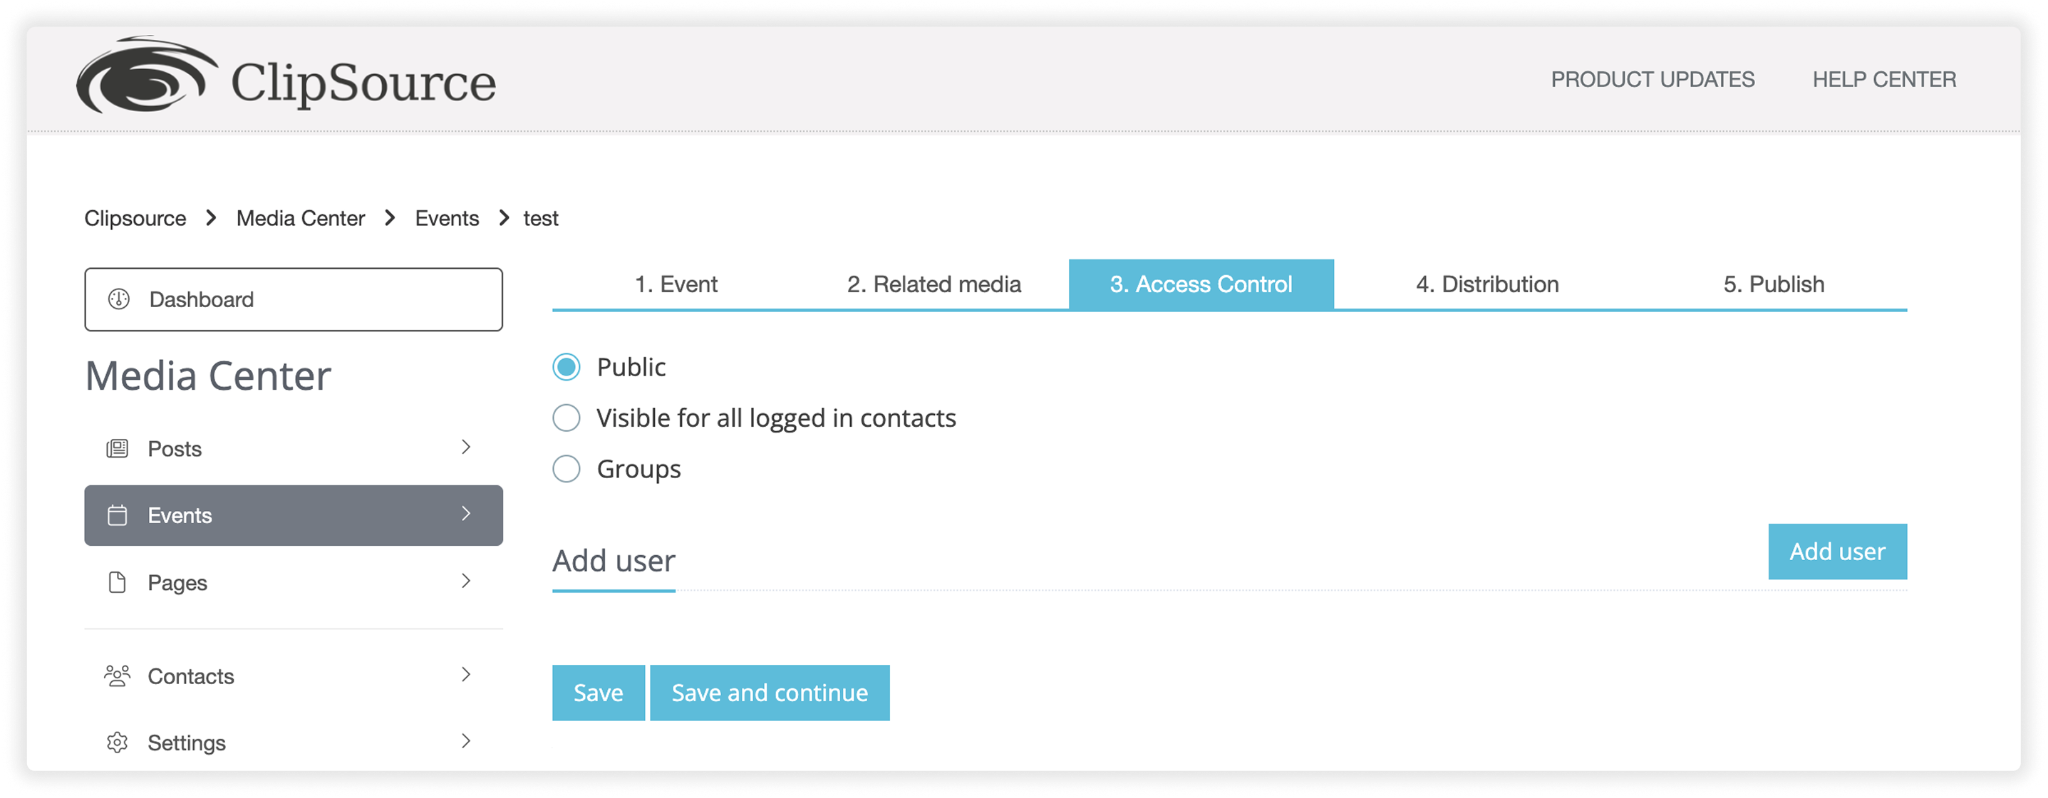
Events can now be published publicly, which brings their visibility options in line with Posts. This is something a lot of you have asked for, more than once.
Under access control, you decide whether an Event is:
- public
- available to all logged-in contacts
- restricted to groups or individual contacts
Public Events require no authentication and can be displayed in both Media Center and Website. A good use case: a save-the-date invitation to journalists for an upcoming press event showcasing your autumn premieres, published openly before you've locked in a date and a location — then updated with the details once you have them. Start and end times and the RSVP options all work exactly as before.
⚠️️️ Note: RSVP is still optional, and we'd recommend leaving it off for public Events — you can't collect confirmed attendees from an unauthenticated audience. If you do enable it on a public Event, the RSVP turns into an email form instead.
Where to find it: Media Center → Events → create or edit an Event → tab 3. Access control
Reusable brand colors
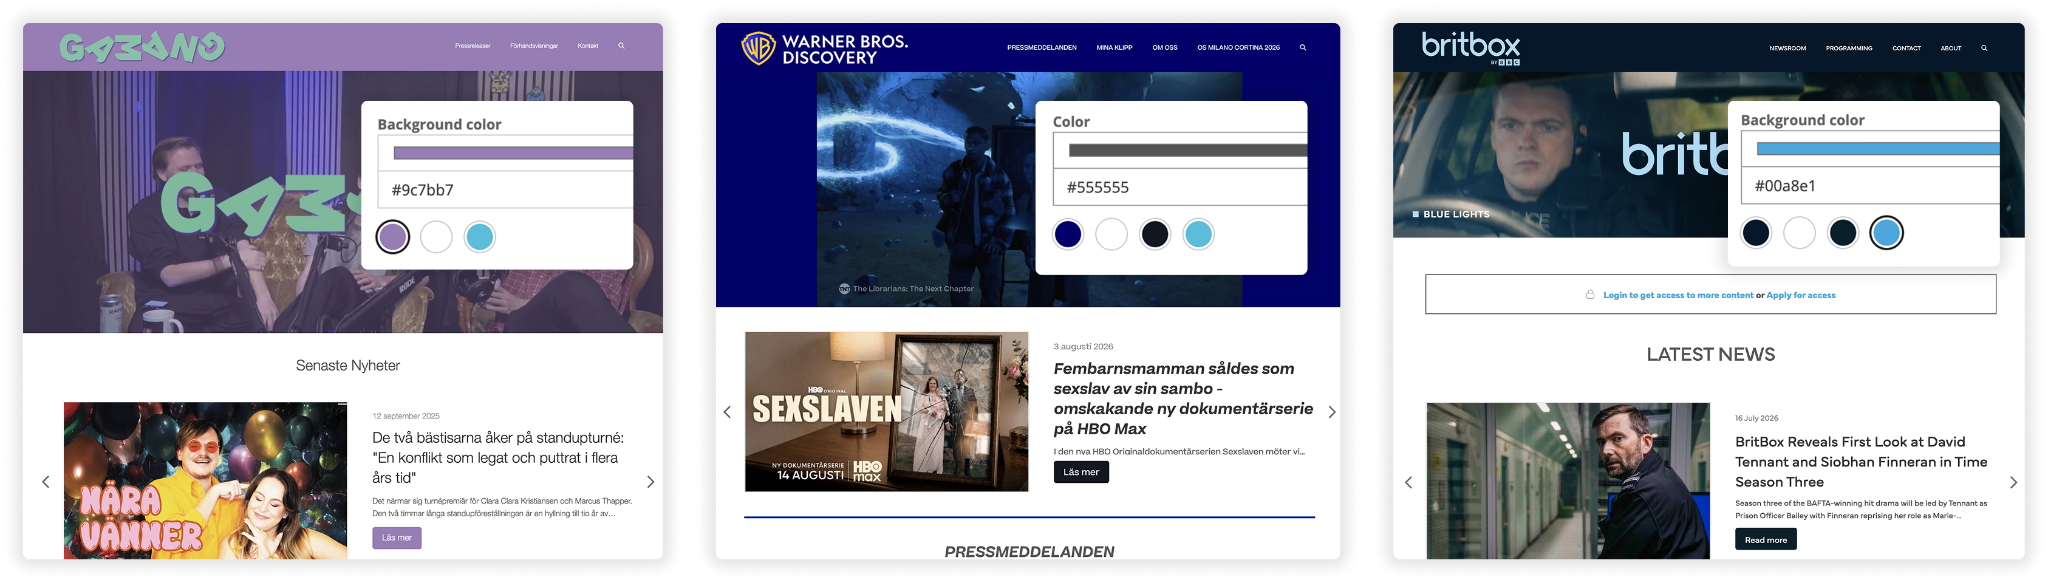
(Our head of marketing’s new favorite feature) The colors configured for your Media Center or Website are now automatically available as reusable color presets throughout the relevant editors.
So when you're picking a background, button or text color in Pagebuilder — or working with an image in Mediabank — you can choose straight from your own brand colors instead of hunting down and re-entering hex codes every time. You can see the hex code by hovering over each color, and if the same color appears several times in your setup, we only list it once.
Faster content creation, and much easier brand consistency across everything you publish.
Where to find it: Pagebuilder → any color picker (page background, buttons, text) → your brand colors. Also available in Mediabank when working with images and choosing background cropping colors.
Improved search across Media Center and Website
Search has been expanded and made a lot more consistent across both products.
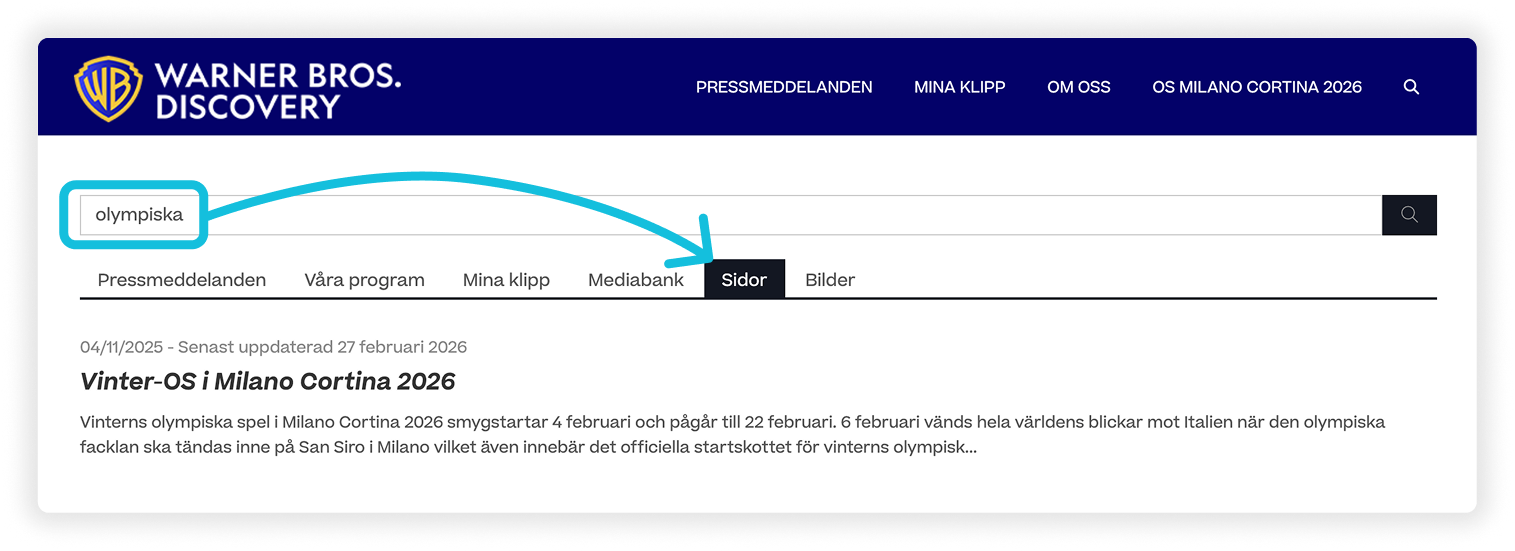
Pages are now searchable. Pages built with Pagebuilder can be found through global search, based on their titles and their text content. Results show the date, the title and an extract of the text where your search term appears.
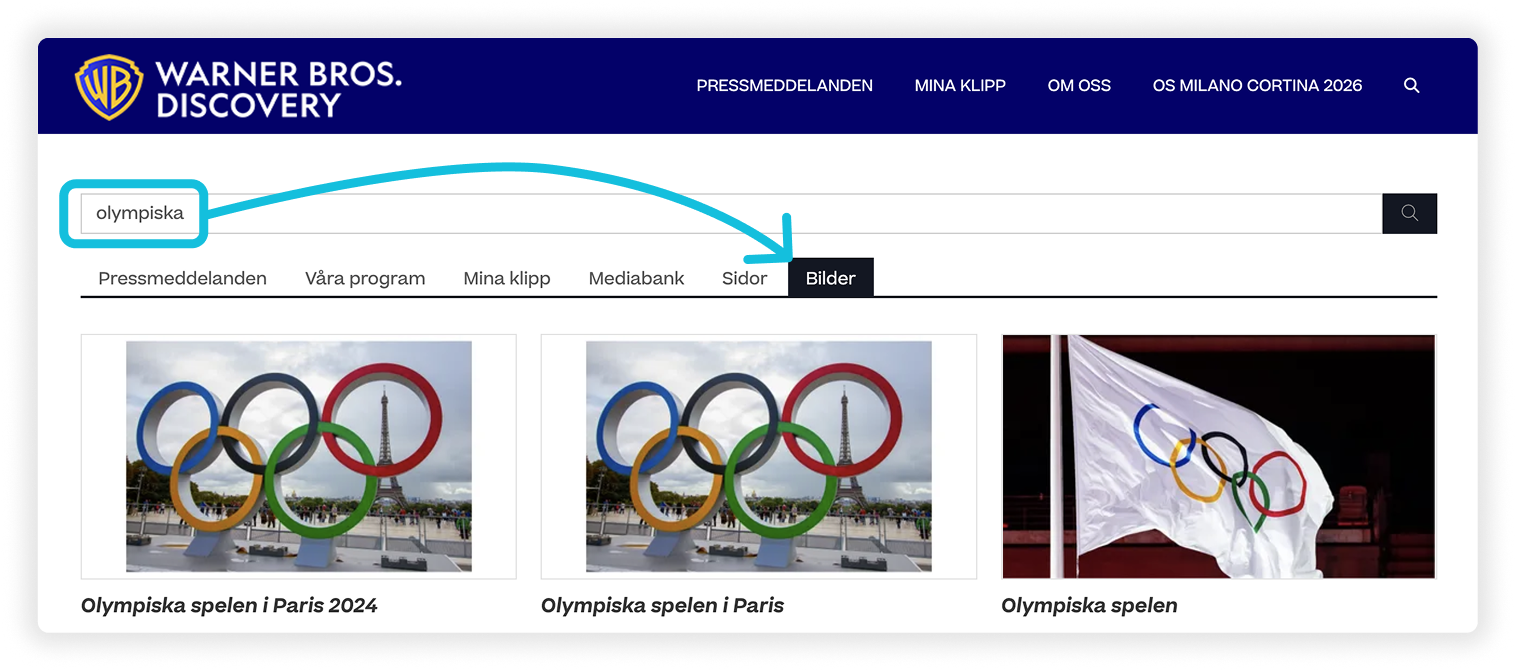
Images are in one place. Previously images were split across separate Image and Mediabank tabs. Everything now sits under a single Images tab, covering images stored in Mediabank as well as images used as related media. Existing access permissions are respected — you'll only find what you already have access to.
Search is back in Website.
Post search in Website now follows the same search and categorization model as Media Center.
Where to find it: Media Center or Website → global search
Safer image cropping when images are reused
We've changed how reused images are handled when you crop them.
Previously, if you pulled an image from Mediabank into a Post and a colleague later cropped that image in Mediabank, your Post got the cropped version too — sometimes changing the whole point of the image. Now, every time you use an image somewhere else in the system, we create a copy. Your crop belongs to where you made it.
So if you place a 16:9 image in a press release and a colleague crops the Mediabank original to 1:1, your press release keeps its 16:9. And you can still crop your own copy however you like, without it rippling out anywhere else.
Much safer image reuse, and considerably less risk of accidentally changing something you've already published.
Where to find it: Any Post, Screener or page → Related media → pull an image from Mediabank → crop as usual
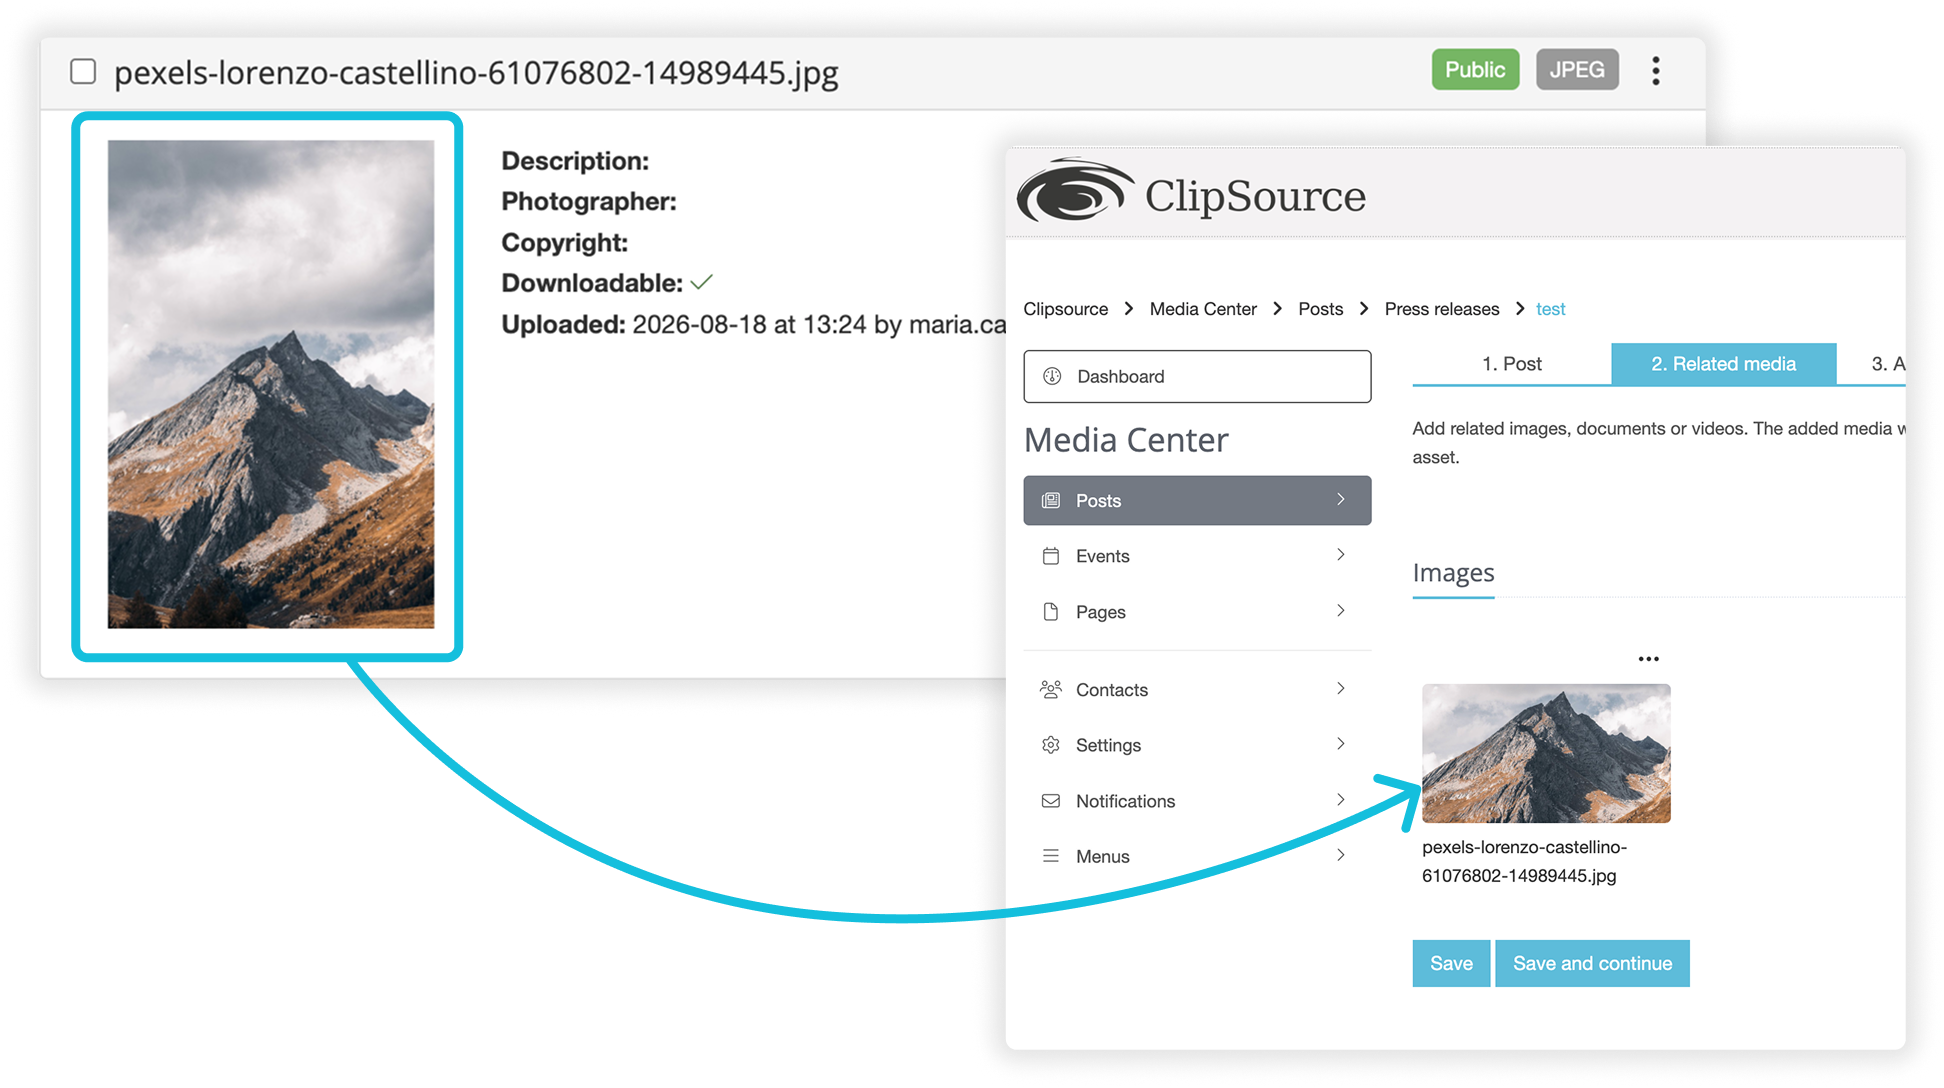
Find recently added programs
Program Catalog now uses the date and time when program content is received through your integrations, which makes recently added content far easier to find.
Note that this is about when it arrived in Program Catalog, not whether it's a new show — which is what actually matters when you're marketing content, whether that's a brand-new series or a film you've just picked up the rights to.
Admins can filter Program Catalog by the last day, seven days, 30 days or year. The same filtering can also be enabled in Media Center, as part of the existing filter function, so that visitors can sort on added date alongside genre and alphabetical order.
Particularly useful for large, continuously updated catalogs, where finding what arrived overnight used to be genuinely difficult.
⚠️️️ Note: The Media Center filter is enabled on request rather than automatically. Get in touch if you'd like it switched on.
Where to find it: Admin → Program Catalog → filter by period. In Media Center: Programs → filter → Select time frame
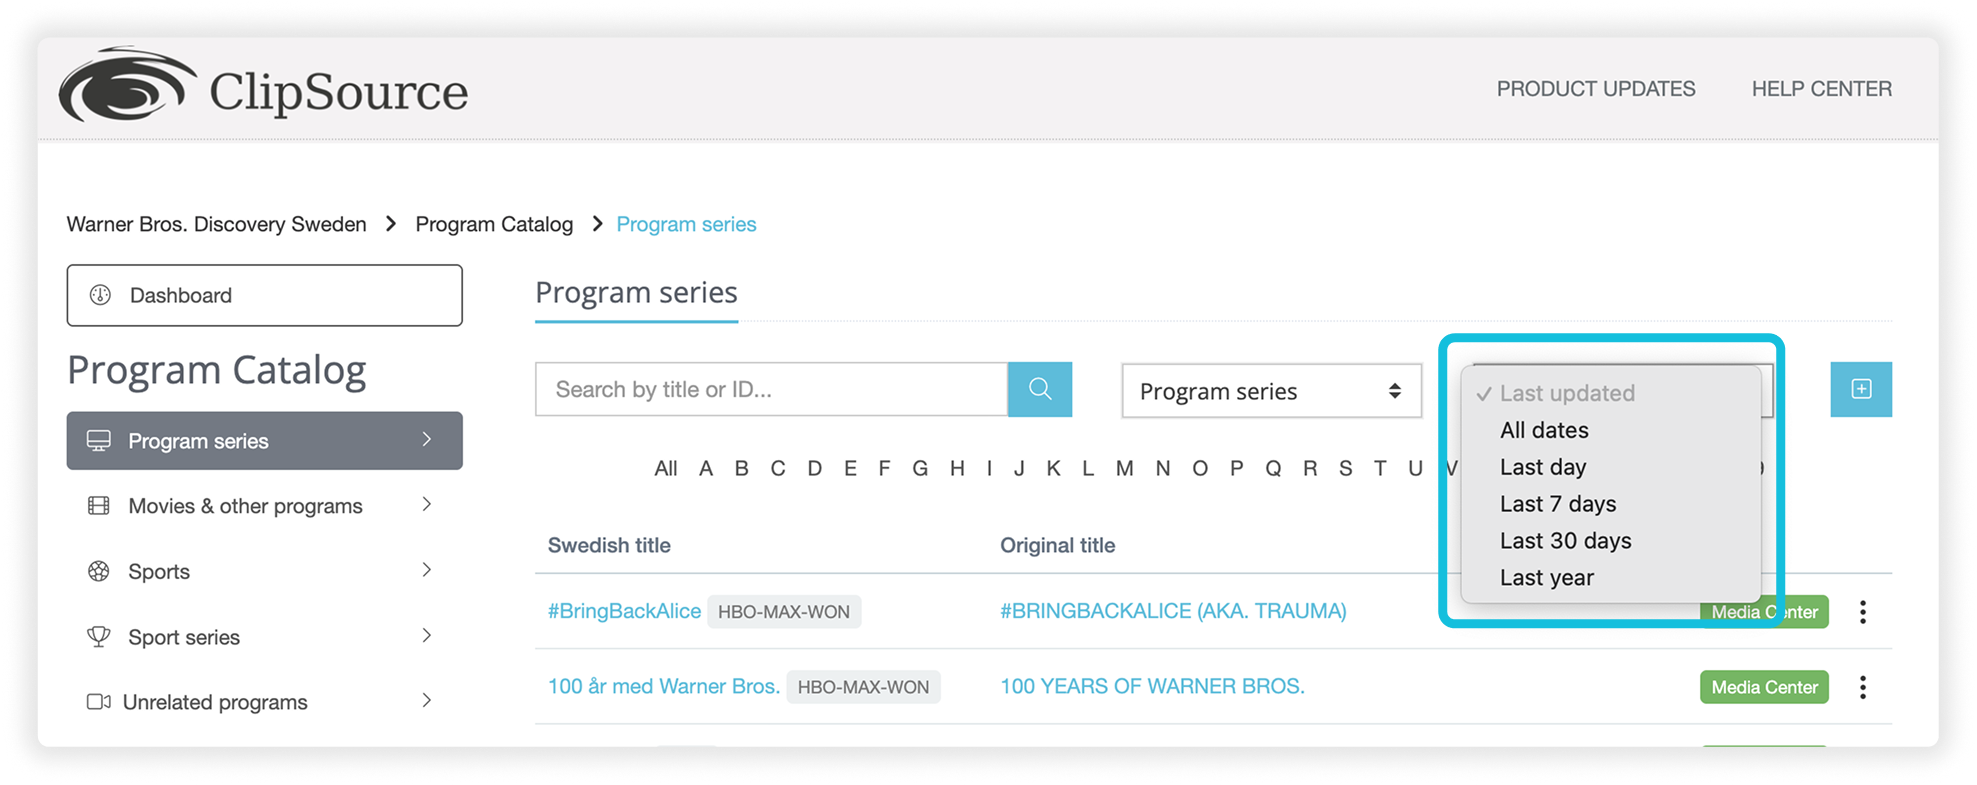
Smaller improvements worth mentioning
Search and export in Statistics
Statistics for both Media Center content and Screening Room now include search and CSV export. You can search the underlying user and activity data — plays, related downloads and notifications — to quickly find what you're looking for, or export the complete dataset as CSV for further analysis. A much quicker way to works with your statistics when there's a lot of data to dig through.
Where to find it: Media Center or Screening Room → Statistics → search or export as CSV
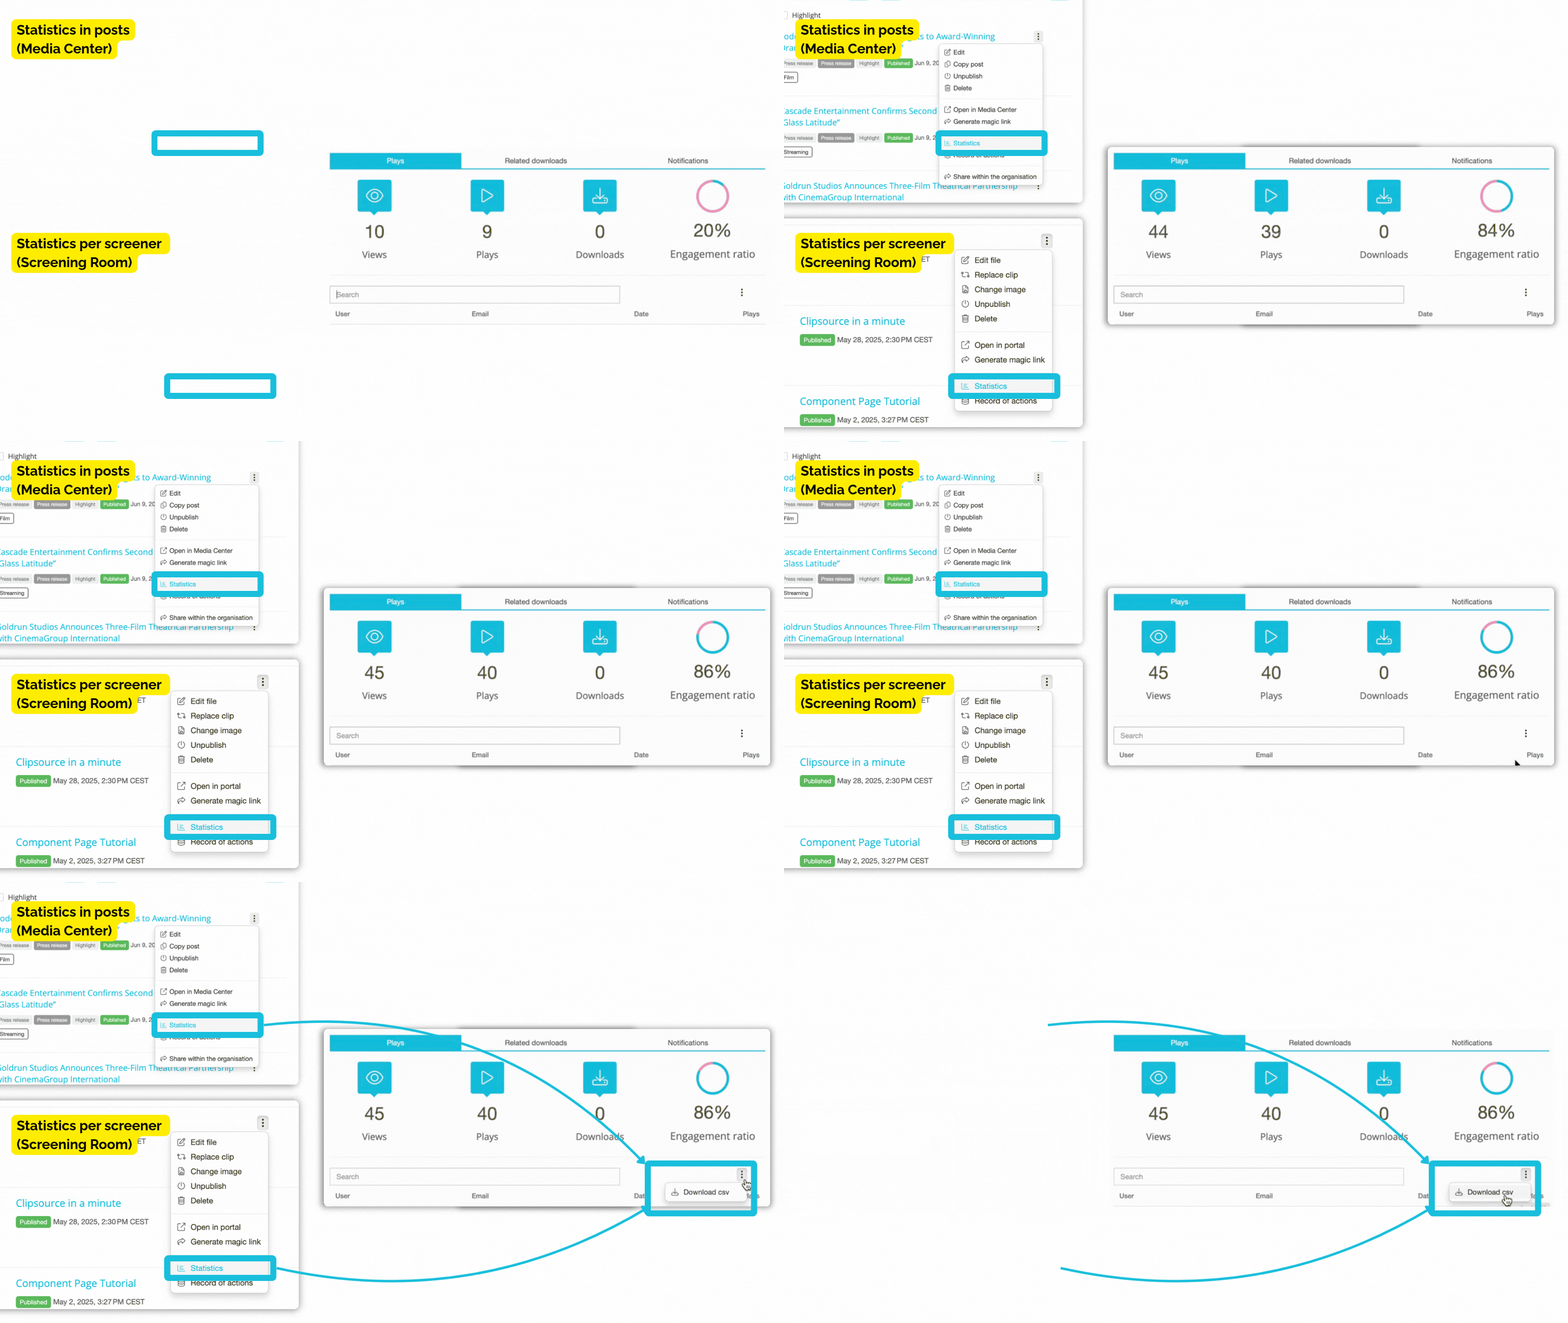
Search in public Schedules
Visitors can now search program schedules directly from the schedule view. The search covers the full schedule, making it easy to find programmes without browsing day by day. Matching results are presented in a clear list with dates, times, channel and programme information.
Where to find it: Your public schedule page → search
Calendar view for Events in Pagebuilder
Event components can now use the Calendar View layout that's already available for Shared Premieres and Shared Live content — handy for a page collecting your upcoming press events.
Where to find it: Pagebuilder → Events component → layout → Calendar View
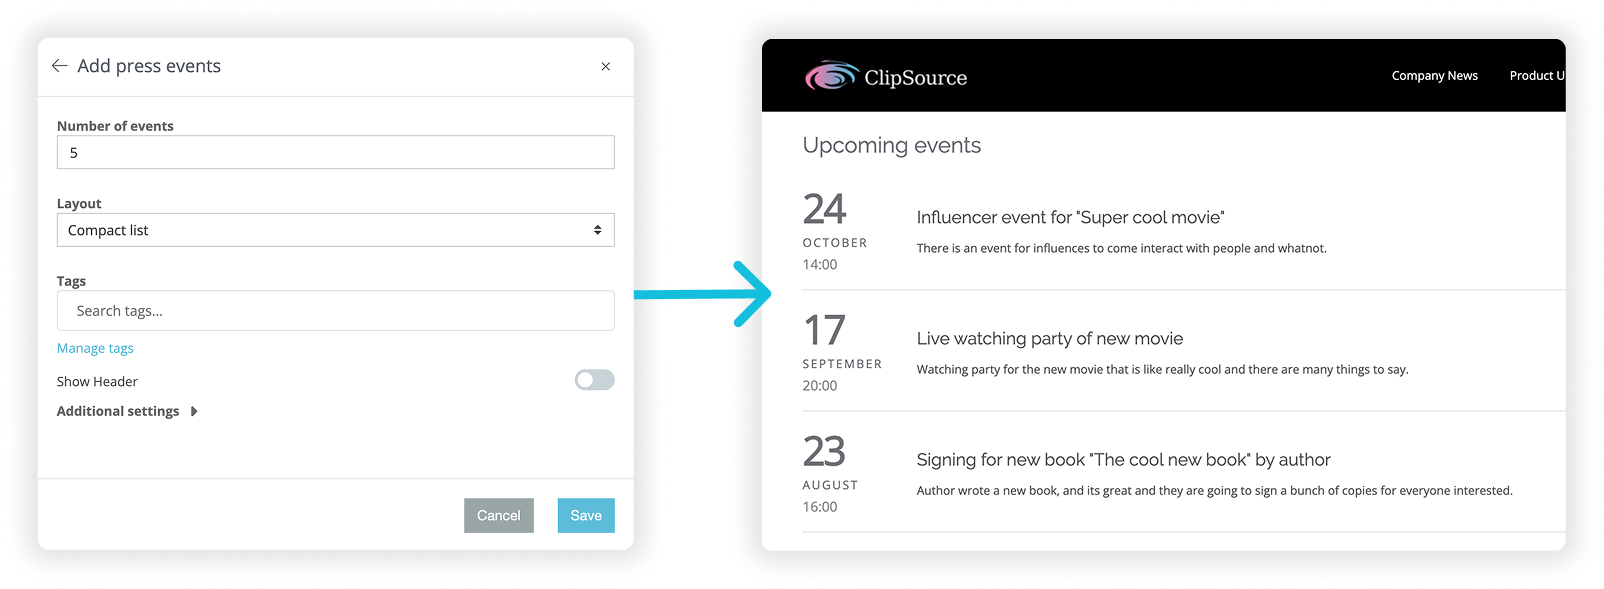
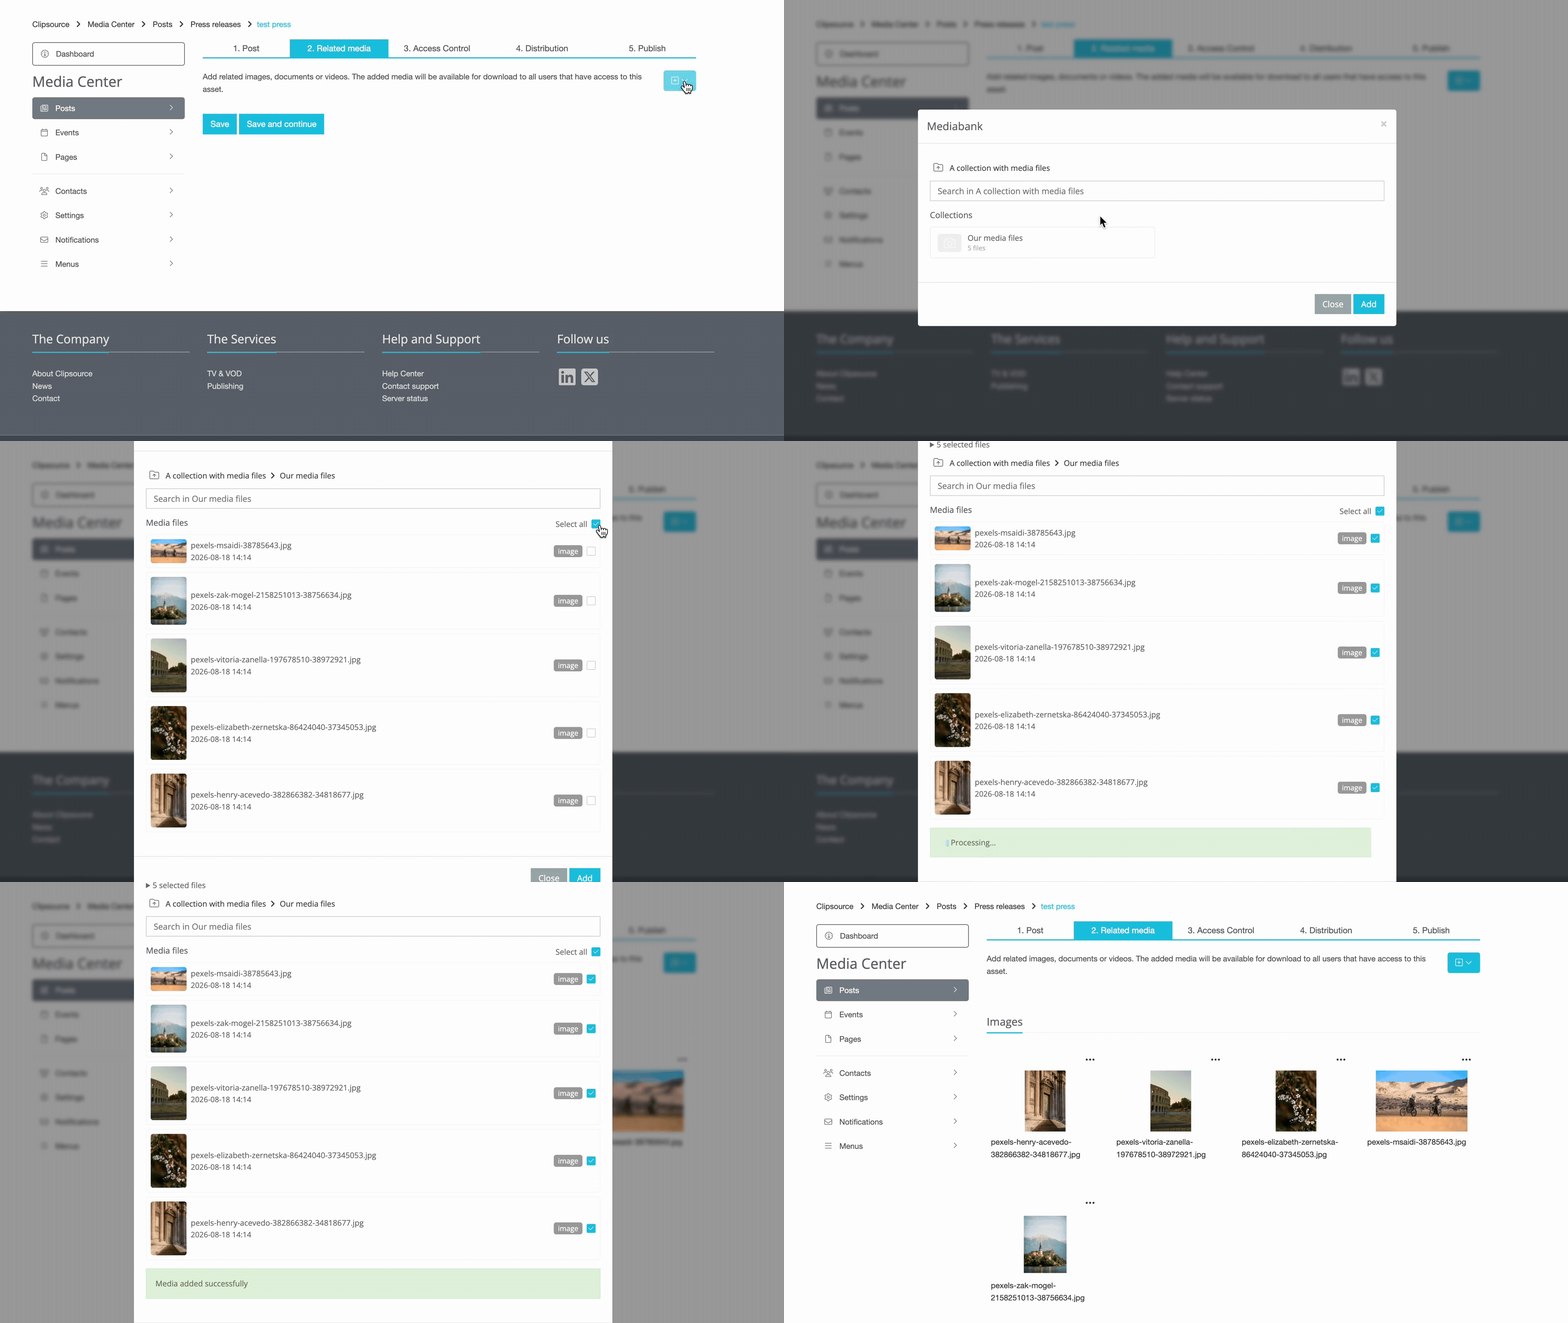
Select all when pulling from Mediabank
When you're adding related media to a Post or a Screener and pulling assets from Mediabank, you can now select all available assets instead of picking them one at a time. Mixed selections are sorted automatically, so a video, an audio file and an image all land under videos, audio and images respectively.
Where to find it: Any Post or Screener → Related media → Add media from Mediabank → Select all
Better discoverability for Pages
Published Pagebuilder pages are now included automatically in your sitemap.xml, which helps search engines discover more of your site content. Create a new page and the sitemap updates itself — and only public pages are included, of course.
And that's all folks!
Good to be back after the summer. As always, if you have questions about any of this, or want one of the on-request features switched on, we're at support@clipsource.com.
Contacts

Johan Wiklund
CPOLatest news

September product updates: Passwordless login, easier content reuse & drag-and-drop uploads
September may be drawing to a close, but there’s still time for another round of product updates. With IBC behind us, we’ve gathered a mix of new features and smaller improvements designed to make everyday work in Clipsource a little smoother. Let’s take a look!
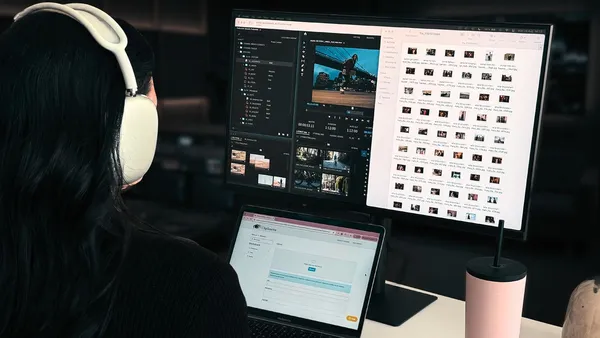
Clipsource tackles the overlooked security gap in TV promotional workflows at IBC 2026
Partner Upload gives broadcasters and streaming services a secure, controlled way to receive promotional assets from production companies and other external partners.
June Product Updates: NEW features, FRESH updates & more.
This month is all about giving you more control over how your content looks — and a much smoother way to get media into the platform. We're introducing a brand-new Columns component, fully customizable footers for Media Center and Website, fresh layout options for your lists and schedules, and a radically simpler upload experience in Mediabank.
May Product updates: Smarter admin workflows, safer sharing & faster search
This update brings improvements across Screening Room, Mediabank, Program Catalog and Media Center Pages, focused on saving admin time, improving content accuracy, strengthening compliance, and making shared content easier to manage across organizations.
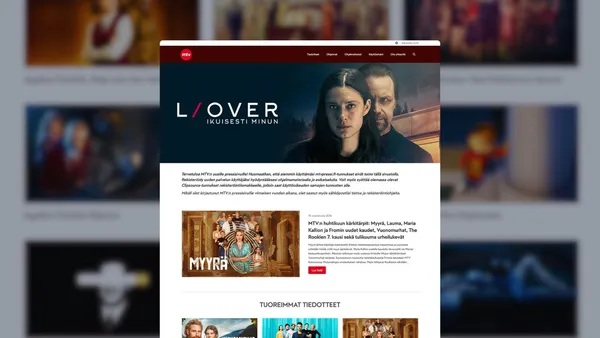
Clipsource launches Media Center with MTV in Finland
FOR IMMEDIATE RELEASE Stockholm, 16 April 2026 Stockholm-based Clipsource, the only PR and communications platform truly made for TV and streaming, today announced that it has launched a new Media Center with MTV, the leading commercial TV and streaming platform in Finland. MTV is a cornerstone of the Finnish media landscape, reaching millions of viewers across news, entertainment, sports, and drama. The channel is known for strong local journalism, premium Nordic content, and major international formats, and plays a central role in shaping daily news consumption and popular culture in Finland. The new Media Center from Clipsource will give journalists, partners, and media professionals fast and intuitive access to news and media assets related to MTV’s programming and initiatives. By centralising rich media and contextual information, the platform is designed to: Strengthen media coverage by making MTV’s content easier to find, access, and use for journalists across Finland and internationally Streamline media workflows with automated press material ingestion. Increase editorial efficiency by reducing time spent on asset delivery and coordination MTV and TV4 are both part of Schibsted’s TV Media business area, operating with shared Nordic teams and functions. While TV4 has been a long-standing Clipsource customer, this collaboration is now being extended to include MTV. “With Clipsource, we are enabling a harmonized Nordic way of working across TV4 and MTV. A shared platform allows us to streamline our processes, reduce manual work, and ensure consistent, high-quality communication around our content.”, said Jannike Croona Broman, Head of TV Operations, TV4 & MTV. “For us, it’s important that working with MTV’s programme materials is as smooth as possible for journalists. With Clipsource, most of the content flows are automated, which frees up our time to focus on what really matters – exploring new possibilities to engage the media”, said Maiju Saloranta, PR & Communications Manager, MTV “MTV is a hugely important brand in the Nordic media ecosystem, with a strong legacy and a clear focus on high-quality content,” said Dan Willstrand, CEO of Clipsource.“We’re proud to extend our collaboration within the TV4 family and to support MTV with a modern Media Center that helps journalists and partners access rich, accurate, and timely information effortlessly.” Following a strong start to the year, Clipsource is seeing rapidly growing demand for communications services tailored to streamers and broadcasters. The shift is driven by a clear industry need: to unify workflows and simplify content management and distribution. By bringing press materials, screeners, video, and schedules into one platform, Clipsource enables media companies to serve journalists and partners faster and more effectively. At the same time, tighter budgets and leaner teams are accelerating the need for smarter tools. By integrating with existing systems, Clipsource allows communications teams to do more with less, streamlining operations while increasing reach and impact. MTV’s new Media Center in Finland is now available at https://mtvpressi.fi See images attached: Screenshot of MTV Media Center Dan Willstrand, CEO of Clipsource Jannike Croona Broman, Head of TV Operations, TV4 & MTV Maiju Saloranta, PR & Communications Manager, MTV For more information contact: Dan Willstrand, CEO, Clipsource dan.willstrand@clipsource.com Jannike Croona Broman, Head of TV Operations, TV4 & MTV jannike.croonabroman@tv4.se Maiju Saloranta, PR & Communications Manager, MTV maiju.saloranta@mtv.fi About Clipsource Clipsource is the only PR and communications platform truly made for TV and streaming. It dramatically simplifies communication and data distribution, always with the goal of increasing awareness and consumption of customers’ content. The services include digital Media Centers, Scheduled Distribution, Program Screening, Content Sharing with partners, and much more. Founded in 2010, the company has customers including Warner Bros. Discovery, HBO Max, SkyShowtime, Sony, TV4, Viaplay, Storytel, Piers Morgan, SF, and Nordisk Film. About MTV MTV Oy is Finland’s leading commercial TV company and a home for premium video content, stories and talent. MTV’s media family includes MTV Katsomo streaming service, free-to-air channels MTV3, MTV Sub and MTV Ava, MTV News delivering current affairs across multiple platforms, MTV Sports, and MTV’s pay-TV channels. MTV is part of Schibsted, one of the leading media companies in the Nordics.
March Product Updates: Website – now with Pagebuilder
This month, we’re making it easier to publish, manage, and scale your content across teams and sites. With the upgrade of Website, a new way to build fully public-facing sites, and shared content components across organisations, you can now simplify your setup while reducing duplication. Alongside this, we’ve made a range of improvements to Mediabank, tagging, accessibility, and overall usability.

February Product Updates: an extensive list of new features
This month, we’re introducing dedicated Page statistics, a brand-new Contact form component in Page Builder, smarter tag management, extended API capabilities, and major performance improvements in Schedules. We’ve also improved publishing clarity, strengthened automatic design adaptability, and resolved several important issues affecting media display.
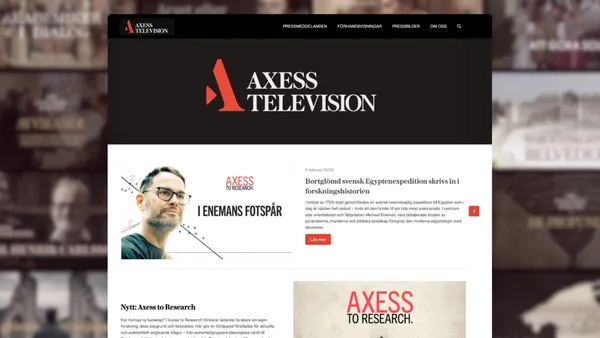
Axess Television Chooses Pressroom from Clipsource
Clipsource, a provider of PR solutions for media companies, is launching a digital pressroom for Axess Television, a Swedish TV channel owned by the Axel and Margaret Ax:son Johnson Foundation.

Product Updates: New File Support, Accessibility & Design Improvements
With the start of 2026, we’re kicking off the year with a set of upgrades and fixes designed to improve usability, accessibility, and overall workflow efficiency. These updates include document support in Mediabank, improved focus handling for accessibility, refreshed contact cards, expanded subtitle language support in Screening Room, and multiple fixes across tags and video playback.
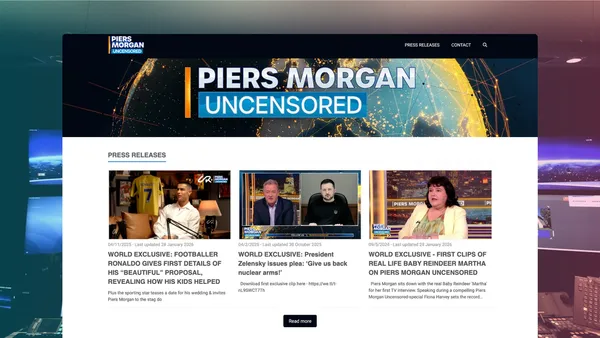
Clipsource to Launch Media Centre for Piers Morgan Uncensored
Stockholm-based Clipsource, the leading provider of digital Media Centres for the entertainment and media industry, today announced that it will launch a bespoke Media Centre for Piers Morgan Uncensored, the flagship YouTube talk show hosted by British journalist Piers Morgan. Piers Morgan Uncensored has become one of the most compelling digital platforms for deep-dive interviews and hard-hitting conversations since its 2022 launch on Youtube. It now reaches millions of viewers around the world, with over 4.3 million subscribers and more than 1.2 billion views to date. Piers Morgan’s career in journalism spans decades — from editing some of Britain’s biggest newspapers to hosting major television programmes. On Piers Morgan Uncensored, he has engaged in headline-making conversations with some of the world’s most high-profile figures, including U.S. President Donald Trump, global football icon Cristiano Ronaldo, and cultural megastars such as Kanye West. The new Media Centre from Clipsource will give journalists, partners, and media professionals fast, intuitive access to press releases, high-resolution images, video, and other assets related to Piers Morgan Uncensored. By centralising rich media and contextual information, the platform is designed to: Streamline media workflows with easy access to pre-release and promotional materials. Increase editorial efficiency by reducing time spent on asset delivery and distribution. Enhance discoverability of show content across global news and online outlets. “Piers Morgan has built a truly global platform that thrives on fearless journalism and cultural relevance.” said Dan Willstrand, CEO of Clipsource.“We’re excited to support Piers Morgan Uncensored with a Media Centre that helps journalists and content partners around the world find the stories and assets they need quickly, accurately, and beautifully presented.”Clipsource supplies digital Media Centres to the world’s leading entertainment and media organisations, including Warner Bros. Discovery, SkyShowtime, Sony Pictures, and Hallmark. In an era where rich media and data accelerate discovery and coverage, Clipsource enables communications teams to focus on value-creating activities rather than logistics.The new Media Centre for Piers Morgan Uncensored was launched on 2 February 2026 and will be accessible at mediacentre.pmu.media.See images attached Screenshot of Media Centre Dan Willstrand, CEO of Clipsource For more information, contact:Dan Willstrand, CEO, Clipsourcedan.willstrand@clipsource.com About Clipsource Clipsource is a platform that dramatically simplifies communication and data distribution for media companies—always to increase awareness and consumption of the customers’ content. The services include digital media centres, schedule distribution, program screening, content sharing with partners, and much more. The company was founded in 2010 and has customers such as Warner Bros. Discovery, HBO Max, SkyShowtime, Sony, TV4, Viaplay, Storytel, SF and Nordisk Film. About Piers Morgan Uncensored As a powerful digital-first brand, Piers Morgan Uncensored surpassed one billion views in just three years. The show has established itself as the home of exclusive, news-making interviews and passionate debate. A weekly highlights programme is broadcast on 5 in the UK, and a new spin-off series, History Uncensored with Bianca Nobilo - the first announced under the Uncensored umbrella - was announced at the end of last year.

Clipsource Unwrapped 2025
First of all, thank you. Truly. Thank you for being with us, for trusting us, and for choosing Clipsource as part of your everyday work. When we look back at 2025, one word comes to mind: intense. But in the best possible way. It was a year filled with movement, decisions, learning, and progress. Not always easy, but always purposeful. In a time of uncertainty across the industry, we chose to focus on what we can control: building a better product and being close to the people who use it. We shipped many improvements this year, shaped by your feedback and real needs, all with one goal in mind: to make your work smoother. What that focus looked like in practice Throughout the year, Clipsource became a daily workspace for more teams than ever. Millions of assets were uploaded, shared, and managed on the platform, supporting everything from press launches to long-term content libraries. Usage grew steadily across markets, with more users, more published pages, and more media being accessed every month. Product highlights from 2025 Behind the scenes, a lot happened. Here are some of the biggest improvements and launches from the year. A brand-new Page Builder We launched a fully customisable Page Builder for Media Center homepages. Customers can now freely design their layout, choose from a growing list of components, and pull content from across the Clipsource platform with no developer help required. Smarter storytelling with new components New components like automated lists, live event blocks, book catalogs, and collection banners made Media Center pages more dynamic and expressive. Tags connect and link content across modules; posts, programs, screeners, and images. Each tag creates a dedicated page, automatically showing all related content. Media management, upgraded A new cropper: Crop images for different layouts with custom backgrounds all while preserving the original file. AI image flags: Customers can now identify AI-generated images, automatically or manually. Security and access, reimagined SSO support: Single Sign-On (SSO) is now available in Admin, enabling secure authentication through providers like Azure AD, Okta, and Google Workspace. Accessibility, done right We’ve rolled out improvements aligned with WCAG 2.1, including consistent icon tooltips, keyboard navigation, alt text fields, and more. More to come in 2026. Smarter workflows, deeper integrations 2025 was all about helping our customers do more with less manual work. Automated post creation: RSS & Atom feeds can now generate draft posts directly in the Media Center. Auto-matching screeners: Screening Rooms now automatically update titles based on metadata from Program Catalog, saving time and improving accuracy. Streamlined push & pull: New UI patterns make it easier to copy/move/fetch content between for example Mediabank, Media Center, Screening Room, and Program Catalog with just a few clicks. Component automation: Pages built with dynamic components update automatically when new content is published. Together, these improvements make it easier to build powerful publishing workflows without the need for custom integrations or extra admin work. Company Updates Building a better product also meant strengthening the team behind it, especially where it matters most: supporting our customers, and showing up to listen, learn, and meet people across the industry. On that note, we hired Linda 🎉In September, we hired Linda Bernström as our new CRO, to head our Sales efforts and strengthen how we support both new and long-standing customers. Where we showed up IBC – Connecting with the global broadcast and streaming community DPP Conference – Engaging in conversations around mediaworkflows,technology, and the future of content distribution. TV-dagen – As usual, packed with interviews, panel discussions, and presentations. KTH – Gave a talk at KTH Royal Institute of Technology for Media Students about Clipsource and our views on the entertainment Industry Giving Back ❤️ In times of global need, we remain committed to making a difference. This year, we’ve chosen to support the campaign to purchase evacuation ambulances named “Oksana II” for the 38th Independent Marine Brigade defending Ukrainian territory. The initiative helps fund lifesaving medical transport on the frontline. This equipment can mean the difference between life and death for wounded defenders and civilians alike. You can see the fundraiser journey here donio.sk As a team we’re proud to contribute to this effort and stand with communities facing extraordinary challenges. That’s all folks! From everyone at Clipsource, thank you for being on this journey with us. We thank all our employees for their hard work and we wish you a great holiday season and a fantastic New Year. Here’s to another year of smoooother PR! The Clipsource Team 💗💙

Product Update – December 2025
Welcome to our final Product Update of 2025. As we wrap up the year, we’re closing strong with updates that improve security for enterprise teams, streamline content workflows, and make everyday editing in Admin a little smooooother. Here’s what’s new this month. Single Sign-On (SSO) – now available in Admin Support for Single Sign-On is now live in Admin for customers using external identity providers such as Azure AD, Okta or Google Workspace. Login is handled entirely through the customer’s own authentication system, improving security, access control, and onboarding. With SSO enabled: Users simply login with their existing corporate credentials, no new username or password needed Password and account management stay fully within the customer’s IT team Users automatically gain access to all authorised accounts SSO and traditional email/password login can run in parallel This update strengthens security, streamline user management, and helps customers meet internal IT policies and compliance standards. SSO is enabled per customer on request. Pagebuilder text editor: Highlight white text When background colours were introduced for components in Pagebuilder, many users began using white text, which could be difficult against the white editor background. inside Admin’s white text editor. To make white text easier to work with, we've introduced several ways to create contrast in the editor. You can add a background color before writing your text, and it will be reflected directly in the editor. I you're adding overlay text to an image or video, you can enable the background overlay (via the toggle in the image or video component) to visualize white text more clearly. Pull From Program Catalog – New Selector We’ve rebuilt the interface for pulling content from your Program Catalog into Media Center posts and Screening Room assets. The new selector gives you: Faster navigation Better search A clearer overview of available videos and assets A smoother way to add content or send as a screener This update makes it much easier to build posts and work with catalog content at speed. That’s a wrap for December! We’re already working on new improvements for early 2026, and we can’t wait to share what’s next. If you have suggestions or want to enable any of the new features, feel free to reach out at support@clipsource.com
Product Update – November 2025
This month’s small but mighty update brings a revamped image preview, a more intuitive Mediabank workflow, and several quality-of-life fixes across Clipsource. Here’s what’s new.
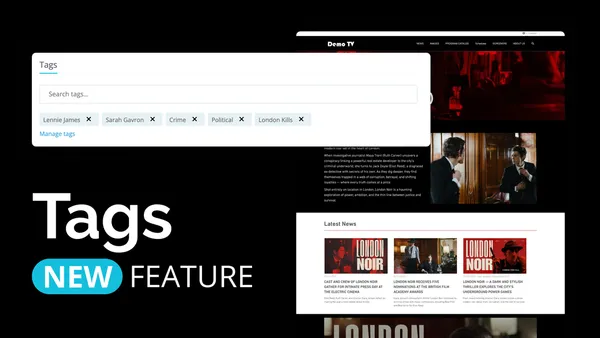
Product Update: Tags! You're it
Winter’s rolling in, but we’re keeping things warm with a batch of fresh updates, and this one, comes with a real game changer. We’re introducing Tags: a new, easier, and more powerful way to connect related content across Clipsource. With Tags, the old Presskit feature in Screening Room is replaced, making it possible to create dynamic collections that automatically update whenever new content is added.
Product Updates: October 2025
Bye Spooky season, Hi November! For this past month we have a round-up of new enhancements that make working in Clipsource smoother, faster, and a little more enjoyable. From better image control to smarter automation and improved playback, here’s what’s new across the platform: